A definitive look into the engine
Initial
Right after the the port to V, a lot of improvements had to be made for it to be a decent render engine. Things like smooth shading, supporting triangles and simple shaders. I’m going to take the chance to expand on a lot of topics left out, or only summarised in first initial blog post. Take this post as a big refresher and a small window into 3D graphics as a whole.
The bounding box
Rasterisers work on one simple concept. With a given set of 2D points that form a face, find all pixels that reside inside the shape and shade them in.
We know how to calculate if a point resides inside a triangle, that’s been done before. So you can start checking every single pixel for an intersection, but not every pixel has a chance to be inside the face. Checking every single pixel is incredibly slow, so why not check the maximum and minimum bounds of each face. The graphic on the right shows each face being drawn after each other and a purple box encompassing the complete faces bounds. Instead of checking against every pixel on the whole frame, we check against every pixel contained inside those bounds. It’s a key factor that keeps rasterisers fast!
Supporting triangles
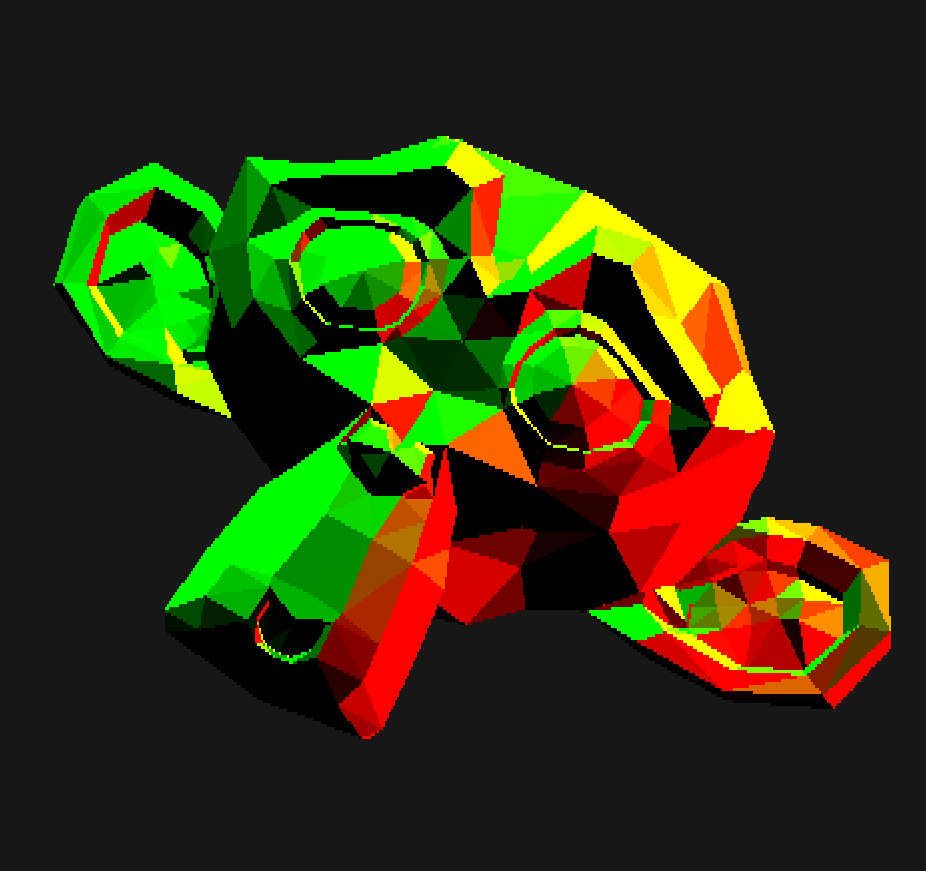
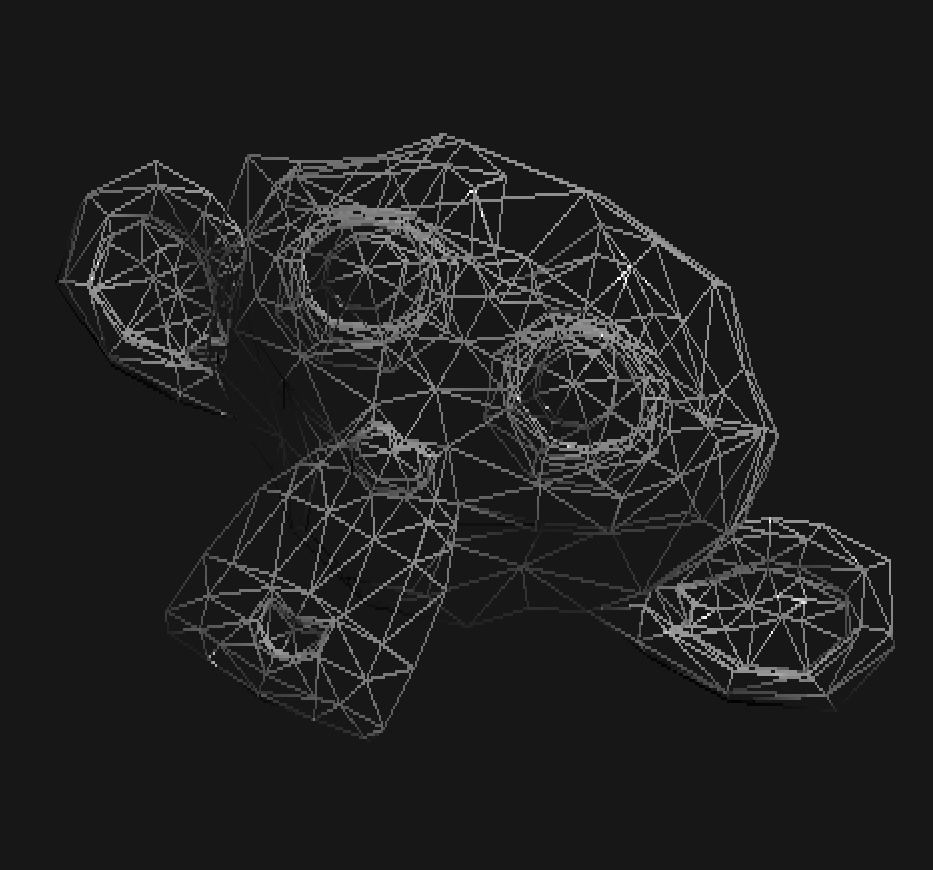
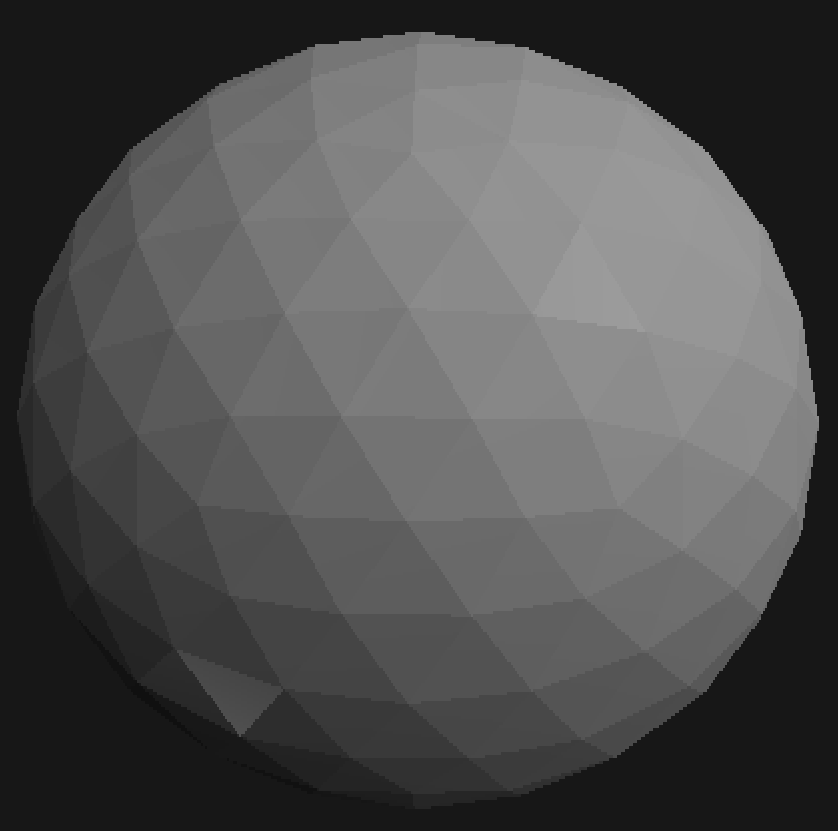
Face Normal Vector of each triangle and a Wireframe view of the model
I went with the decision to support triangles because any shape can be broken down into smaller triangles. Anything and everything can be represented by triangles, that’s why graphics cards are so optimised for triangles and triangles only. Originally I couldn’t render the Blender Suzanne since it contained a small amount of triangle faces and the rest quads. Once that was complete, any mesh that I imported using a refactored blender python importer, could be rendered.
I had to change the intersection code for one that works with 4 points (quad face) to one that works with 3 (triangle). That was fairly simple though and I went on to working on vertex interpolation next.
The normal vector
Before I talk about vertex interpolation, I should expand on the normal vector. The normal vector is very important, it’s used to calculate lighting and the “front” and “back” of faces.
The normal vector usually sits perpendicular to a single vertex or perpendicular to the middle of a face’s vertices. When a single vertex has a normal vector it’s called a vertex normal. When a whole face has a single normal, it’s called the face normal.
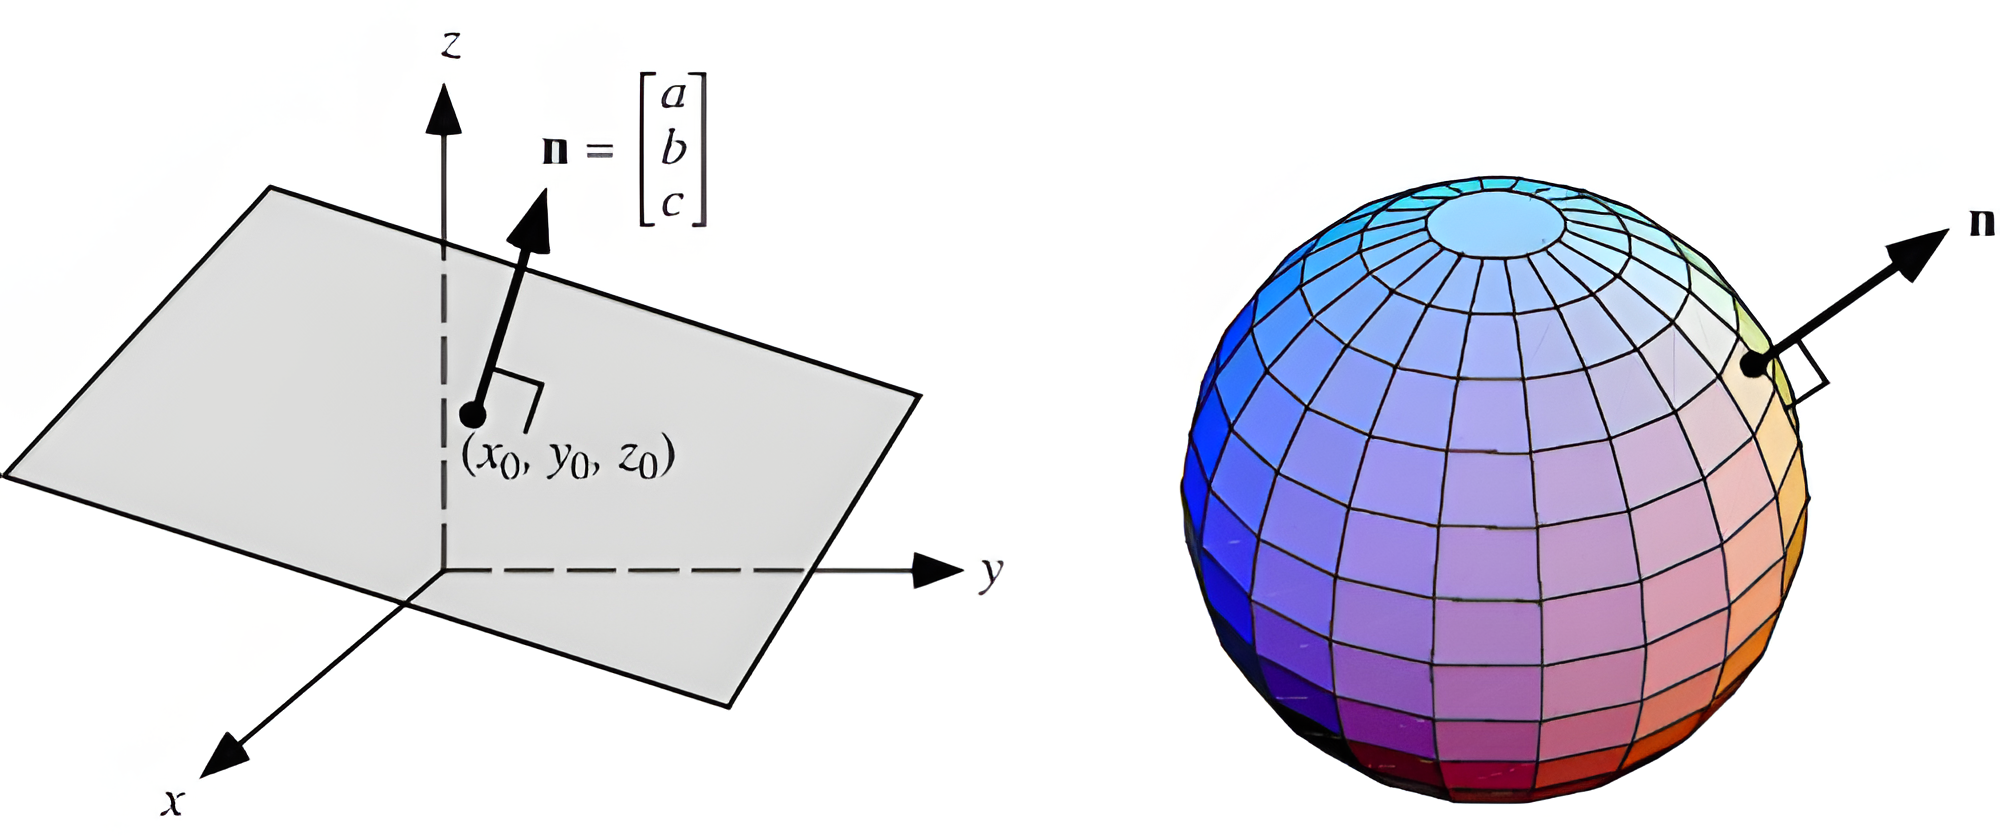
The N vector is the normal vector, notice how it points outward from a 3D face
A simple shader for lighting was talked about in my first post. It works by calculating the cosine of the angle between two vectors, or in simpler terms, how aligned two vectors are.
If a face is directly pointed towards a light source, it should receive the most lighting and vice versa. How do we calculate which way the face is pointing? The face normal vector! This leads into the next topic about realistic lighting.
Vertex interpolation
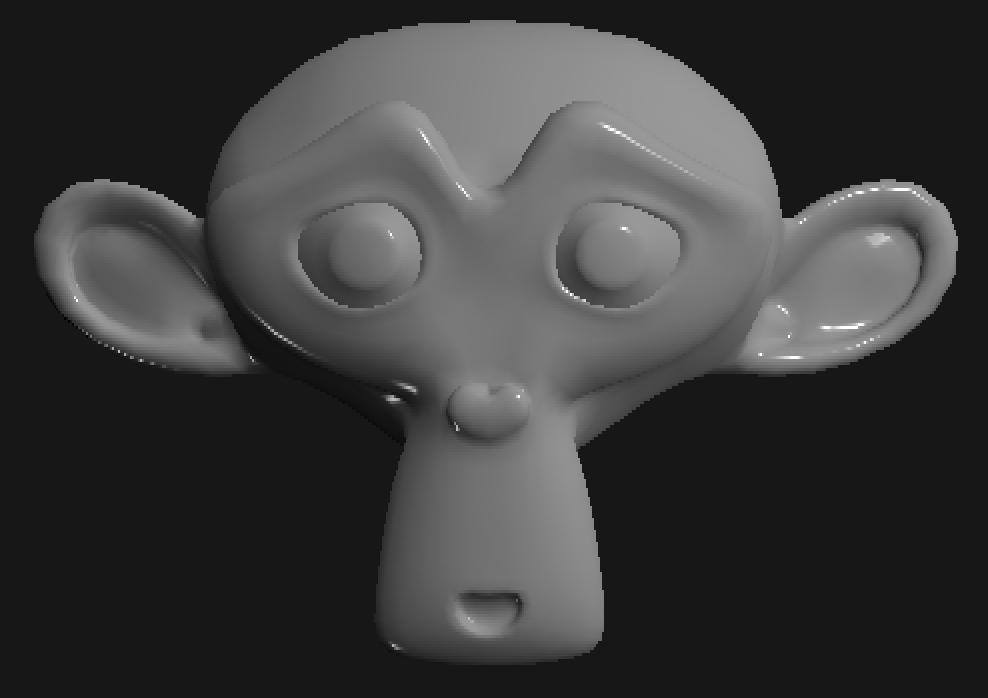
Sure calculating lighting per face is fine, but how do we render smooth shapes like curves or spheres? You would think increasing the perceived smoothness of a shape would be to simply increase the face count. Obviously this is not a good idea as higher face count means a slower render.
Why calculate shading based on every face? Why not every pixel?
This is the basis for Phong shading, or smooth shading. It works by interpolating each vertex normal. So that each face does not have a single normal vector defined by it’s face normal, instead each vertex normal is smoothly interpolated along the face. Faking a smooth surface, with no defined flat faces.
With a single normal vector for every pixel, we can calculate lighting as if the object was perfectly smooth.
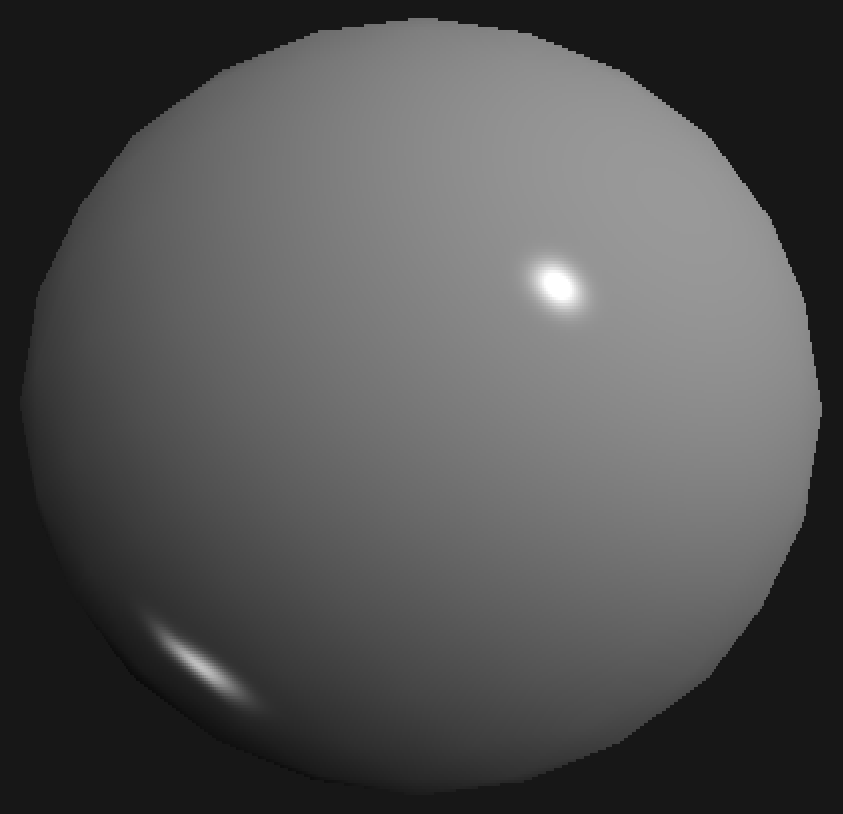
You can see reflections on the sphere, it’s an old technique to approximate real lighting. It’s called the Phong reflection model. It’s much better than the simple diffuse lighting in older versions of the engine. It uses Phong shading to interpolate vertex normals over a face to be used for accurate lighting calculations. I will talk about it’s implementation below.
Fragment Shaders and the Phong Reflection model
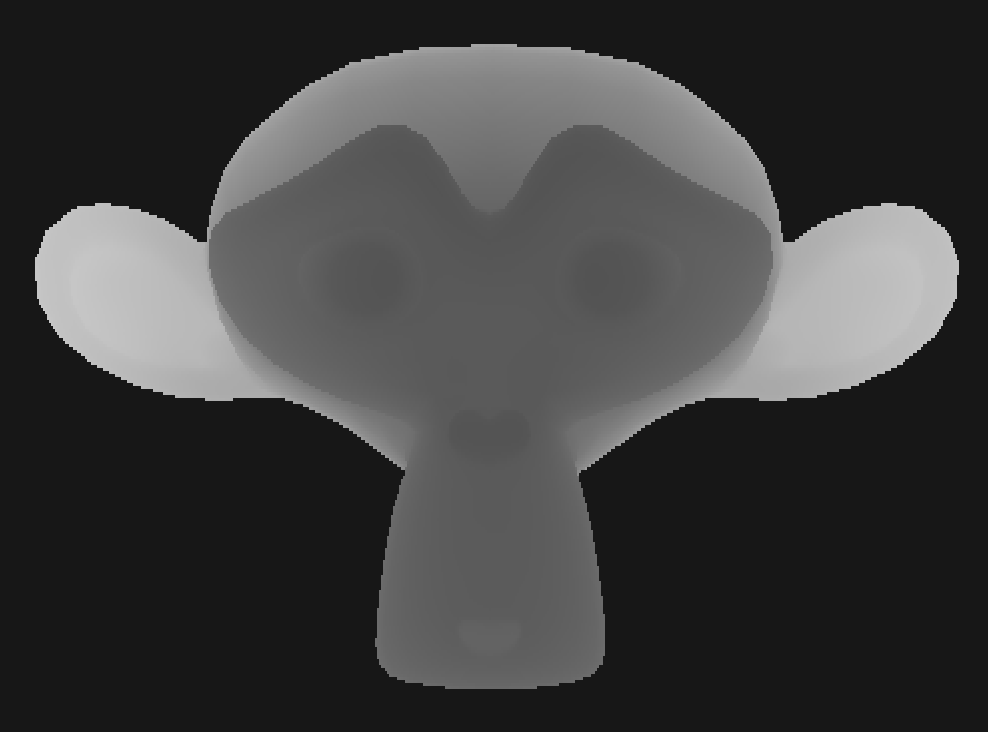
Relating to images above in order:
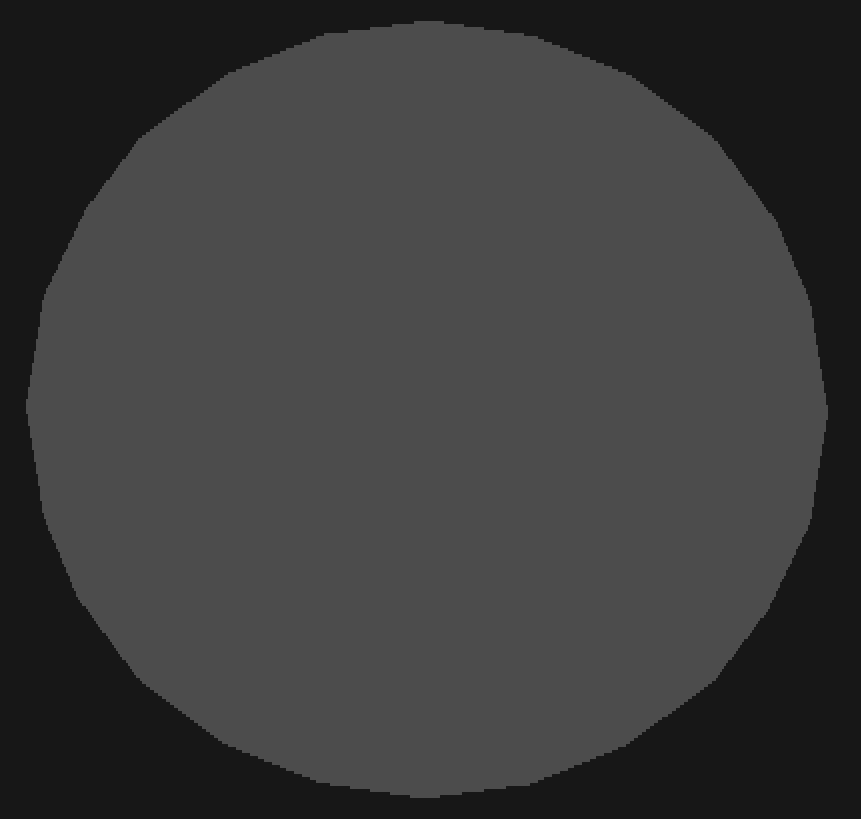
- Z depth information, the distance a pixel is from the
camera
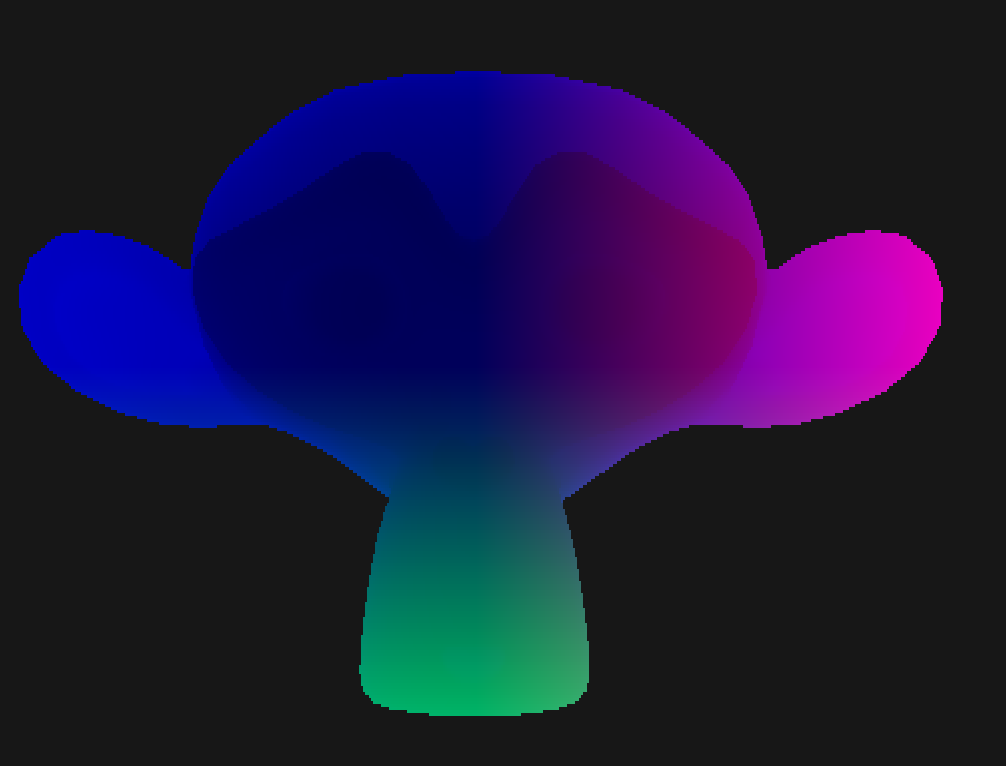
- Position information, a 3D position relating to every
pixel
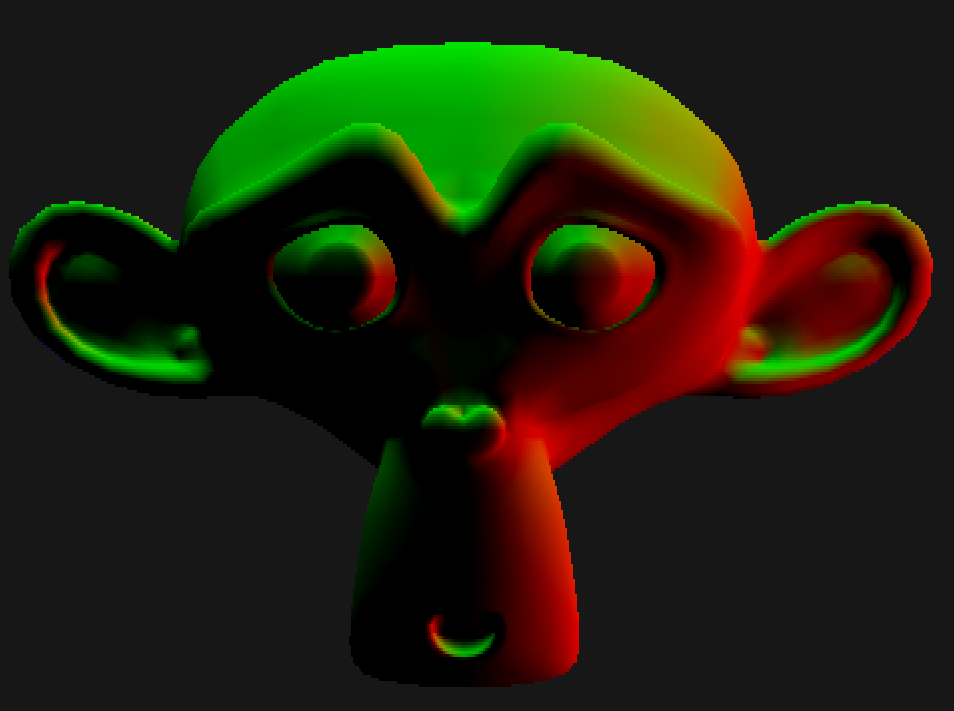
- Normal Vector Information, a Vector describing a
faces orientation
I have talked a lot about the word Shader without explaining it. Shaders are a way to take a visually meaningless set of data from scene, and transform it into a meaningful image. Shaders are used when detailing shadows, lighting, texture gradients, and more. Think of shaders as a transformation, a step in the rendering process to create a “shaded” image.
I’ll be talking about the fragment shader, a set of code or a function ran on every pixel after the rasterisation step to determine the final look. The fragment shader has access to data such as the normal vector, position and Z depth of the whole scene.
Using this data and your creativity, you can write a custom shader for absolutely everything!
The Phong Reflection model
The phong reflection model is a way to calculate lighting with 3 components,
- The diffuse or matte lighting
component
- A baseline for 3D lighting. Older versions of the engine used this only.
- The ambient lighting component
- Think of ambient lighting as an all encompassing light from all directions, a base lighting that gets combined with all other components
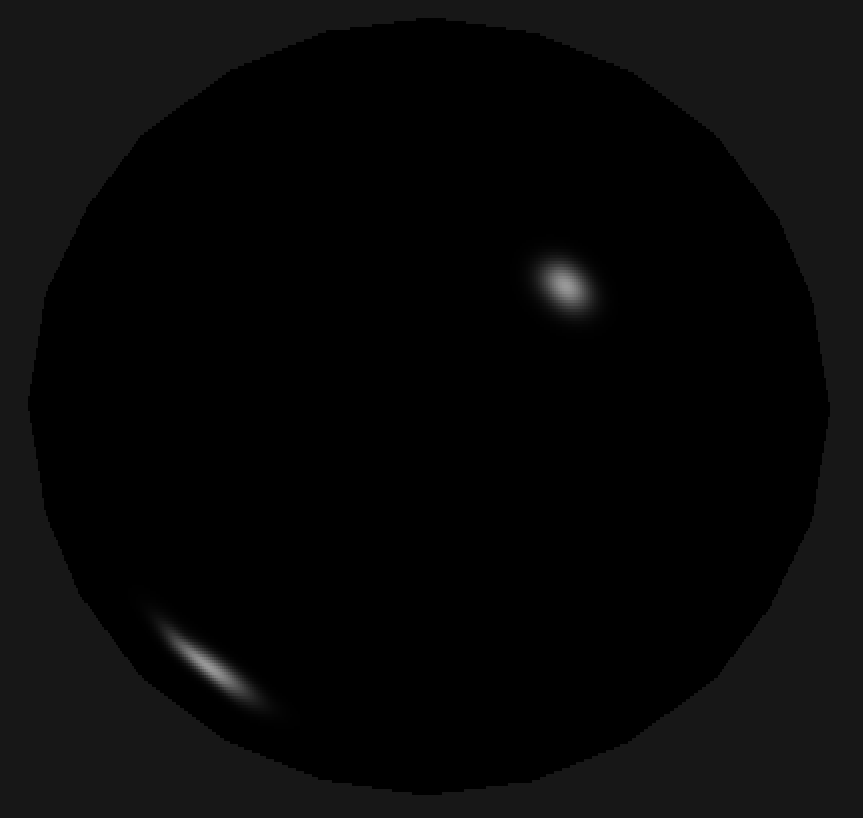
- And finally, the specular
reflection component
- More commonly called specular highlight, a model of the reflection highlights from a light. Not exactly a reflection, but a highlight.
Each component is added together, to achieve the final shaded look
Constant Variables in the shader
light = Vector{-5,-5,5}
        // the lights position

ambientimportance = 0.3
diffuseimportance = 0.3
specularimportance = 0.6
        // factor each component contributes
shiniess = 160
        // the shininess of the specular reflection

specularcolour = parsecolour("white")
ambientcolour = parsecolour("white")
diffusecolour = parsecolour("white")
    // a white colour
r_view = Vector{0,0,-1} // the viewing vector out of the camera
Components to the Phong Reflection Model
Diffuse
vectortolight := frag.position.subtract(light)
        // get the vector pointing towards the light from the
        // current pixel's position
lightingamount := diffuseimportance * vectortolight.dot(frag.normal)
        // calculate the amount of lighting received by a pixel by
        // checking its "alignment" to the light source
diffuse := diffusecolour.smultiply(lightingamount)
        // final diffuse lighting
Ambient
ambient := ambientcolour.smultiply(ambientimportance)
        // final ambient lighting
Specular
reflectedcomponent := vectortolight.reflect(frag.normal)
        // calculate the vector if the vector pointing towards
        // the light was **reflected** off the face
specularscalar := math.pow(r_view.dot(reflectedcomponent),shiniess)
        // calculate how "aligned" the vector is to your viewing
        // angle. based on this, we can calculate how bright the
        // highlight must be
specularamount := specularimportance * specularscalar
specular := specularcolour.smultiply(specularamount)
        // final specular lighting
The diffuse, ambient and specular components
The final shaded look
frag.colour = diffuse.add(ambient).add(specular)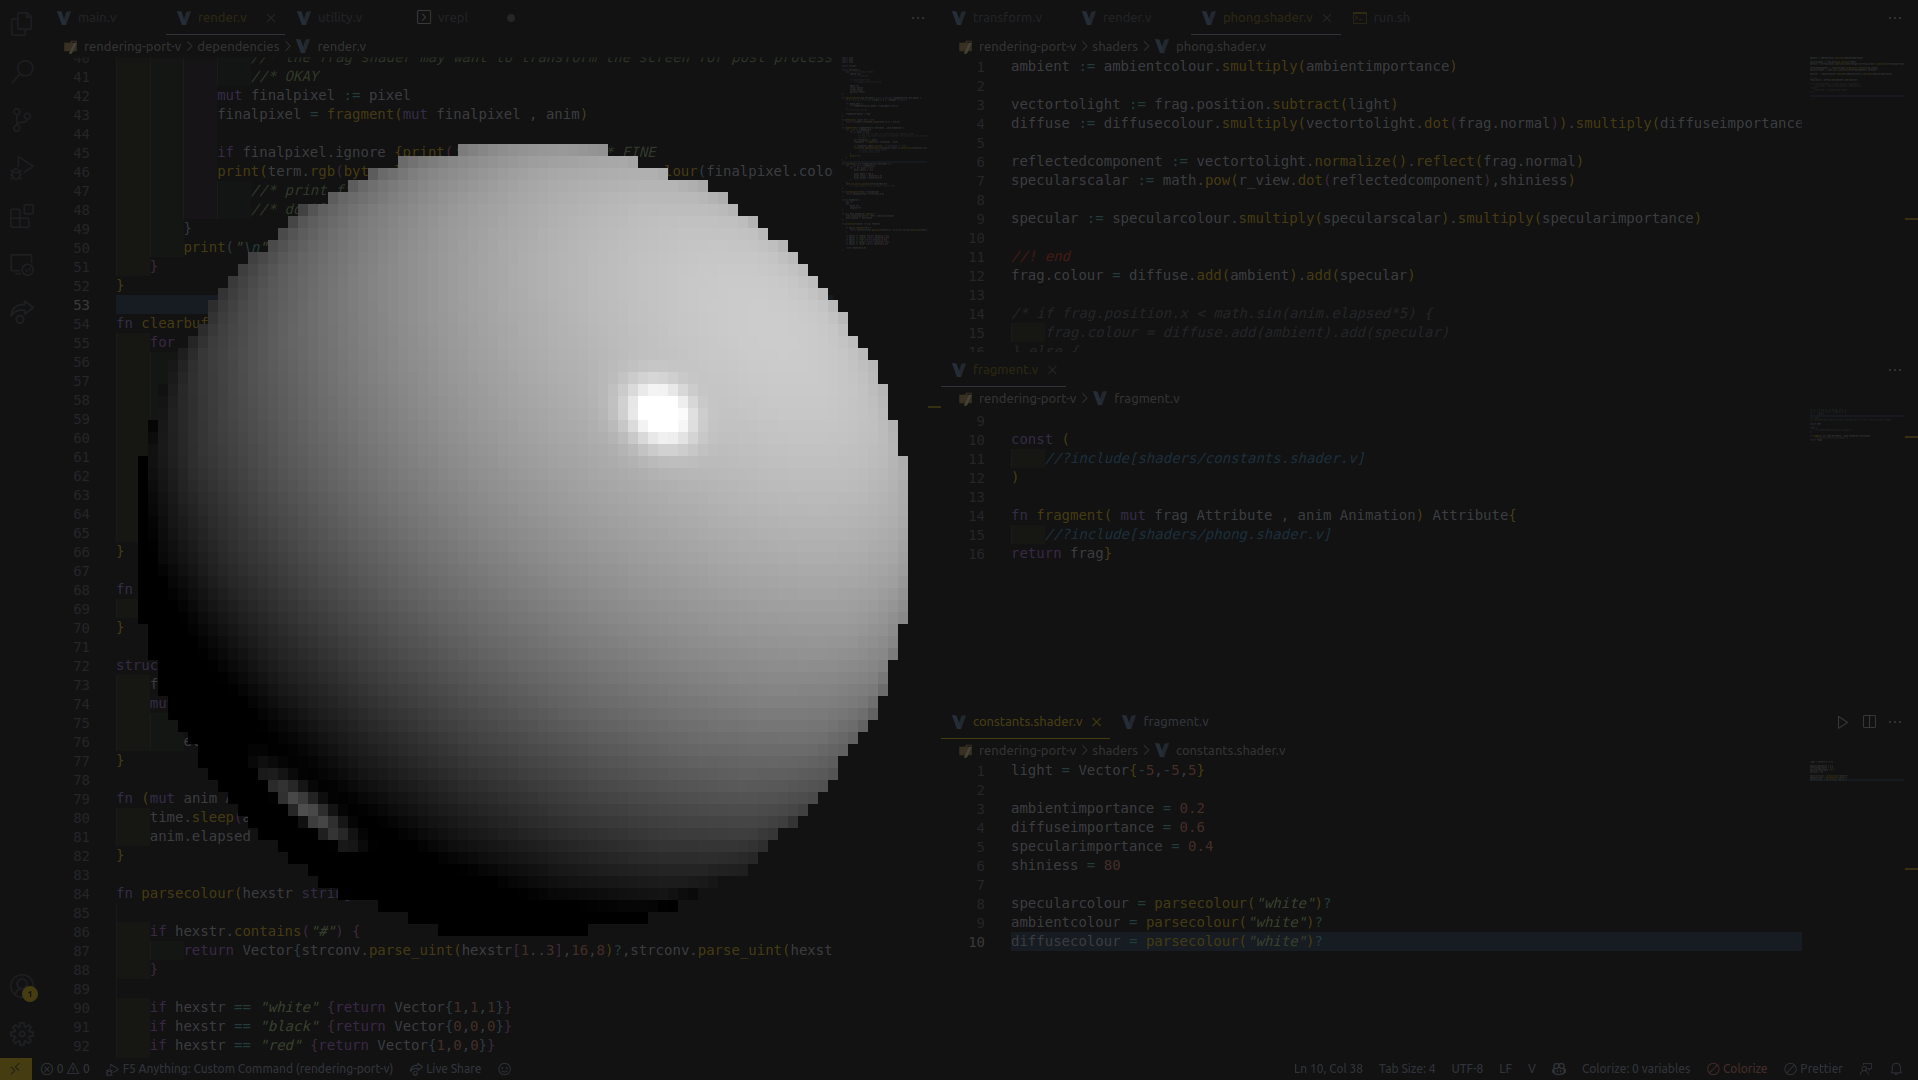
Forward
This engine has been really fun to create and document through these blog posts. I have a passion for 3D and I just want to help people and myself learn through these projects.
Here are my visions for this engine!
- Applying textures using UV mapping
- Reflection mapping and Skyboxes
- Screen Space reflection
- A terminal multiplayer game, rendered all inside this engine!